Remember the days of passing out paper, scissors, and glue sticks and then having a huge mess to clean up in your classroom? Thanks to our digital age, that could be a thing of the past! Here I will walk you through how to make Digital Cut & Paste activities for your students using PowerPoint. (To see a video of this type of activity, click here.)
Why is this a good alternative to the old fashioned way? First let me say, that I still believe “good ‘ol cut and paste” is still beneficial for students. As we know, some students really need the tactile experience that can be lost in the digital age. It allows them to collaborate with each other and share ideas. However, digital cut and paste saves you from the mess, allows you to be paperless, and provides an opportunity for the class to do it together via a projector. So, let's get started!
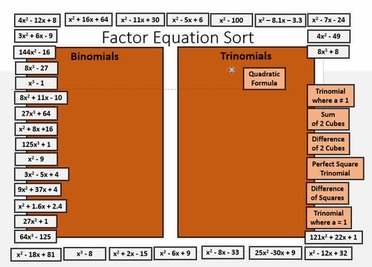
1. Choose a Concept: If you have old cut and paste activities, I would start with those. You are already comfortable and familiar with them. If you have never made one, or used one before, think about concepts that need sorting, matching, or ordering. In my high school math class, I have had students sort features of functions, match quadratics with their factored form, and order steps to geometric proofs. I have also created resources all the way down the grade levels to Kindergarten, where students spell CVC words.
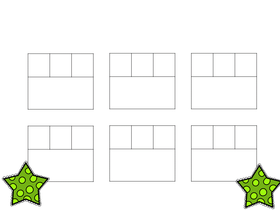
2. Decide on a Graphic Organizer: As you create your activity, always think about the old fashioned cut and paste. Students usually are asked to paste items in some organized manner on a mat or a sheet that is some type of graphic organizer. Design the graphic organizer in its own slide and make sure to take up the full space.
1. Choose a Concept: If you have old cut and paste activities, I would start with those. You are already comfortable and familiar with them. If you have never made one, or used one before, think about concepts that need sorting, matching, or ordering. In my high school math class, I have had students sort features of functions, match quadratics with their factored form, and order steps to geometric proofs. I have also created resources all the way down the grade levels to Kindergarten, where students spell CVC words.
2. Decide on a Graphic Organizer: As you create your activity, always think about the old fashioned cut and paste. Students usually are asked to paste items in some organized manner on a mat or a sheet that is some type of graphic organizer. Design the graphic organizer in its own slide and make sure to take up the full space.
3. Save Organizer as a GIF: By doing the next 2 steps, it makes it easier for students to drag and drop their pieces. If this step is skipped, students get frustrated as they may in avertedly edit the organizer. Simply go File --> Save As --> Save As Type Drop Down Menu --> GIF --> Current Slide Only.
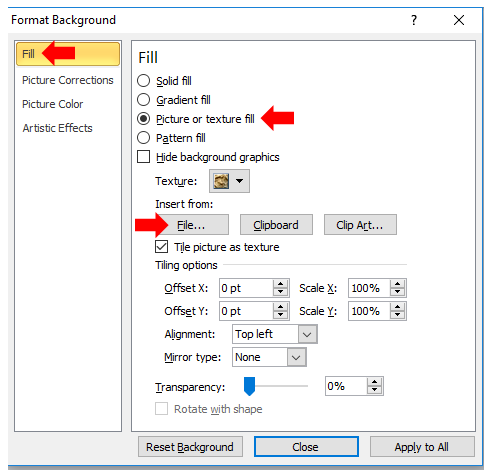
4. Set the Organizer GIF as the Background: Go to: Design Tab --> Background Style --> Fill --> Picture or Texture Fill --> Insert From --> File and choose your file that you just saved in Step 3.
4. Set the Organizer GIF as the Background: Go to: Design Tab --> Background Style --> Fill --> Picture or Texture Fill --> Insert From --> File and choose your file that you just saved in Step 3.
5. Duplicate Slide: Now that the background is set, right click on the slide and click Duplicate. This is good to do now so that you always have a background to work off of. Duplicate the slide as many times as you’ll need the background, and give yourself one extra just in case you need it later.
6. Create Cut & Paste Pieces: Again, think about what kind of pieces students would have if they were doing the activity on paper. I have found that it is easier for students to have these pieces made as objects. To do this, design your piece on another slide, then use the Snipping Tool to create the object. (If you have never used the Snipping Tool, you should be able to find it using the search feature in your start button. Here is a quick tutorial on how to use it.)
There are several tricks I have learned in this step:
6a. As I create my pieces, I like to create the answer key first. This way I ensure I have all the pieces I need. It also ensures there is enough room on the graphic organizer for the pieces to fit. If an adjustment needs to be made, I usually make the pieces bigger or smaller. To do this uniformly, select them all (hold the SHIFT key down as you select them), and change the size all at the same time.
6b. Duplicate the answer key slide and use that to scramble the pieces. I usually put the pieces outside the view of the slide as seen above in the Factor Polynomials activity. It is the equivalent of students working with pieces scattered on their desk rather than scattered on the graphic organizer.
6c. Be careful with fancy fonts you may use for your TpT products as they most likely will not transfer to student versions of the activity. When I have wanted to maintain those fonts, I use the snipping tool to turn them into objects like discussed in Step 6.
That’s basically it! Once you get a rhythm, you’ll never want to turn back to scissors, scraps, glue sticks, and a mess.
I am excited to see how your TpT Digital Cut and Paste activities come out!
Leave a link to your activity in the comments section below and I'll be sure to check them out!
Thank you for reading and don't forget to follow me on Facebook and Pinterest.
-Stephanie
Leave a link to your activity in the comments section below and I'll be sure to check them out!
Thank you for reading and don't forget to follow me on Facebook and Pinterest.
-Stephanie
